Image Map

Monday, February 15, 2016

READING BUDDIES
A mentor reading program to combine upper grades with lower grades to create a friendly community of working students. 


I work in a low socioeconomic area.  We are a Title 1 school and many of my students are on food stamps.  Many of them do not have the family life at home that lends itself to allow them to get the extra help and support they need.  Therefor, I have been working with my admin to put together a mentor program with lower elementary students and upper elementary students.  To kick start the program we are placing lower elementary students with a higher elementary student for a Reading Buddy program.  

For this program I created a resource packet so the students can read with their partners and respond to their reading.  The following information breaks down the packet to show you what is included. 

Getting to Know Your Buddy

TO begin, I start the packet out with some getting to know you pages.  There are boy versions and girl versions. Here, the students write down things they learn about their partner from a session of questions and answers. 


In this same section I added a Buddy List where the two can discuss the top 5 books they Love to give them an idea of what kinds of books they like to read.  This will help the Reading Buddies program mean more to each student. 


Next, I added a page for the students to discuss how they really feel about reading.  This will give the mentor an idea of what they are working with, as well as give them a chance to show students who do not lie reading how wonderful it really is.  


Characters

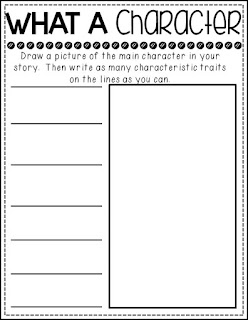
Next, I included two pages for students to analyze the characters in their story.  These focus on inside and outside characteristics.


Setting, Problem & Solution 

Next, there are three pages dedicated to analyzing the setting, problem and solution of the story.  On each of these pages the students are asked to draw a detailed picture of each and then write about it as well. 


Making Connections

The following three pages are included for students to work with their partner on learning how to make great connections to their story.  The first page includes all three connections (text-self, text-text & text-world).  The other two pages focus on text-self and text-text.  


Creation Pages

The next two pages are two small little creation projects for the partners to work on.  The first is for them to create their own new ending to the story.  Then they are asked to compare it to the real ending. The second project is for them to create a new cover of the book.  

Thank You Notes

TO finish up the pack, I included thank you notes for the little ones to write to their mentor for all the time and hard work they did!


So there you have it!  That is all the resources that are included in this pack!  I am extremely excited to start this with my kiddos next week!  I hope that it brings students together young and old and helps create a sense of community between the older and younger kiddos!!!




Thursday, January 21, 2016

SNOW MUCH FUN WINTER PLACE VALUE CENTERS


Hello everyone!  I am oh so very happy today because.....


HAHAHA YES!!! We got a snow day today!  And.... We get one tomorrow too!! Woohoo!! Why do we get another one you may ask??? Well... the Virginia, Maryland, D.C. area is predicted to get 25+ inches of snow this weekend thanks to a very large winter blizzard!  I haven't experienced one of these this 1993 when I was 4 years old!!! BUT my hubby and I have plans to make camp in our living room with netflix, candles, wine, fluffy cuddly blankets, and lots and lots of snacks!! So I am very excited for that! I;m also quite excited to see what my little Bella does in her first snow experience ever!!

Soooo...Since I had today off I made myself very comfy on the couch with some Disney movies and got to work on a new product I have been working on.  I have a good size group of kiddos in my classroom who are still struggling with place value.  So, I wanted to make a fun unit for them to work on in small groups!  

This pack is winter themed and focuses in Place Value.  There are 5 different centers in the pack.  I'll give you a little closer look at them below..


The first center in the pack is a  match the pictures game.  


In this game, the students must match the snowball cards with the correct base ten block card.  


Once they match all the cards correctly they can write their answers on this recording sheet to be collected.  


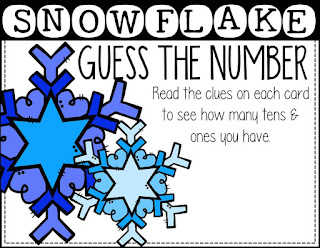
The next center is is a Guess the Number center.  


Here, the students must read the word form on each card and be able to come up with the correct number.  


Once they come up with the correct number, they write it on the recording sheet below. 


The next center is "Do You Want to Build a Snowman?"


In this center the students will have a bunch of different snow balls laid out on the floor.  They will need to place three snowballs together to create a snowman.  However, the snowballs must all represent the same number in word form, base ten form, and standard form.  


Once they think they have all the snowballs sorted out and the snowmen created they can then record their answers on the recording sheet below. 


The next center is the Finding Ten center.  Many of my little 2nd graders struggle with understanding that 10 ones make a rod of ten which goes in the tens place value spot.  This center is a great way for them to practice finding ten in a large group of ones.  


To begin, they look at a card and try and pick out the groups of tens.  Once they find the groups of ten then they can count to see how many ones are left over.  


Once they get the correct amount of tens and the correct amount of ones they can put their answers on the recording sheet below. 


Finally, the last center is a game board center!!!
The game that is included in this center has the students once again focus on the word form in place value.  


They must use counters to work their way around the board till they reach the end.  


They will pick a card from the pile of cards and read the place value word form that they see.  If they can tell their partner what number those words represent then they can move ahead one spot.  If they cant tell what number is represented then they must stay on the spot they are at.  


However there are also reward cards and trick cards in this deck.  If they pick up a special snowflake card they may move up two spaces or take an extra turn.  If they pick up a wacky wind card they may have to lose a turn or move back two spaces.  I know my kiddos will love this one!!


I'm hoping that these centers will engage my little guys who are struggling with this concept and help them to understand it better!  I'll let you know how it goes!!


Saturday, February 28, 2015


Hello everyone! It is currently 12:38 on a Saturday night and I am laying in bed watching a movie and blogging!  It has been a crazy few weeks with wedding stuff, teaching and  a HUGE grad school project!! If anyone has every put together and administered a Qualitative reading assessment then you'll feel my pain! haha!  Anyway, the point of my rant was to explain that I am just now getting to sit down and relax and decompress so blogging about the new project I have been working on seems to be a great choice!

So.... above you will see a picture titled, Gold Star Homework.  I have been racking my brain for a very long time to think of a way to make homework more interesting for my kiddos.  I for 1 am not a huge proponent of homework as a teacher.  I do see the positives of homework, however I do not feel like homework needs to be an every night occurrence in order to be effective.  WIth that being said, I do give homework in my classroom, just not that much.  However with math i think it is a bit of a different story.  

In my classroom I have kiddos that are all over the board with where they stand in Language Arts, Math, Science you name it.  Many of my kiddos are low or speak English as a second language.  For the most part my kids English is fine, however their parents do not speak it at all.  This makes it very difficult to get homework accomplished most of the time because the kids do not always have someone to help them at home.  

As I said before I have since been racking my brain for a new homework idea to help stir some interest as well as give a good review of the concepts taught before the end of the unit comes to a close.  I have come up with my Gold Star Homework idea because of all of this.  These packets are full of different activities for the students to practice the concept/concepts they have been leaning in class.  It is a packet that should be given out closer to the end of the unit for a review.  

So lets get down to the nitty gritty shall we!!!


Every packet will include a page like the one seen above.  It gives the students and parents a brief description of the new friend they will be helping to earn a gold star!  This example introduces the kiddos to their new friend Andy.  Andy needs some help with addition and it is up to the students to help Andy earn his gold star in addition.  There is a gold ticket at the bottom of this page  This ticket is where the gold star will be cut out a glued onto.  Each packet will have a new friend for the students to help out and each packet will have a page like the one above to introduce them to the kids 


Each packet will also include the page like you see above.  This page is more for the parents then it is the kids.  The kids will know how these packets work once they start using them often.  This page goes over the purpose of the packet as well as how it works.  Also, this page has the gold star on it that the students will cut out and glue to the golden ticket if they receive the proper amount of points once the packet is turned in.


This page acts as both the grade sheet for the teacher as well as a tracking sheet for students and parents.  This page shows parents and students each assignment in the packet along with how man points each is worth.  They can easily keep track of their points with this sheet to ensure that they are working hard to earn that gold star!  Once the packet is turned in the teacher will use this sheet to grade the materials and then return it to the student once finished.  If the student earned all required points in the packet then they get to put out the gold star and glue it on to the ticket for both themselves and their new friend.  
Now, below you will see some example pages from the this particular packet which focuses on addition.  Not all packets will have the same amount of activities, pages, or points.  


There will also be an "extra practice" page at the end of every packet for those students who worry that they may not have got every other one correct this is a page for them to earn some extra point to help their friend earn that gold star.  In reality it's just a clever way for the teachers to get their kiddos to practice even MORE!!!! Hehehe we teachers are so sneaky!  

Anyway... I just gave out my first packet last week so I will keep you posted on how it goes.   The kids were really excited about it when I passed it out, and went over it!  They thought of it as a challenge and thought it was really neat that they were meeting a new friend and helping them with their math skills.  We will see how it goes and if the outcome is a positive one!!! I'm really excited about the idea and have high hopes for good things to come from it!  Math is tough and those end of the unit tests that we teachers are forced to give are even harder and outrageous then ever before.  Hopefully we can make some progress with a little bit of fun practice!!!


Oh and I am currently in the process of making my money packet right now and both will be up in my store as soon as money is done!  This will be an ongoing work in progress as i continue to make some for each concept!  

It is now currently 1:07 and my eyes are getting a little sleepy!  Time for sleep and hopefully sweet dreams!  Can't wait to see what tomorrow brings!


Sunday, January 25, 2015


Hello everyone!  It has been a millennium since I have blogged to say the least.  I have had one crazy year so far!  I got engaged, applied for a job in Virginia, took and interview, got hired that day, moved down a week later, got a lease on an apartment and started the week after.  I am also currently in graduate school and working very hard on planning my wedding.  It has been CRAZY, but it has been a great crazy!!! Anyway, I am very excited to find a little slice of time to share on my blog, I have missed it so!! Tonight I wanted to introduce you to my new little project I began working on this weekend. 

This year our school adopted the Math Daily 3 outline for teaching math.  This way of teaching has the teacher instruct students in a 10-15 minute mini lesson at the beginning of each class.  Then the teacher releases his/her students into their centers rotations. I use a 4 center rotation in my classroom.  These include a math facts center, hands on center, with the teacher center, and an at your seat center.  My students rotate to their centers in their groups for about 15 minutes each.  I usually get to 2 center rotations each day which then requires us to finish the other 2 rotations the next day.   

My school also decided to adopt the LEARN model method of lesson planning this year as well.  it is a detailed lesson plan specifically geared toward Math Daily 3.  one of the sections on the lesson plan requires the teacher to give a brief summary of what they will be doing for their 10-15 minute introduction lesson.  Although it sounds quite easy to come up with a 10-15 minute mini lesson it ended up being more difficult then I thought.  I talked with many different teachers and we came up with some different ideas to mix things up and not continue to do the same routine for our introductions.  

I decided to take our ideas and begin created some presentations to use in my classroom to help the 10-15 minute introduction go more smoothly without a lot of set up.  I just created my first PPT today to use tomorrow with my kiddos.  This one is for our new unit of addition with regrouping.  I plan on putting the presentation up on the smartboard and having the students follow along with their white boards.  Here is what it looks like!!


I begin my presentation with a few review slides of what we learned in our introduction lesson.  Here are some examples:


I then go into creating slides that have practice problems on them for the kiddos to complete on their whiteboards and showing their work.


My first shot with this will be tomorrow and I am anxious to see how it works!  i will keep everyone posted!  I am hoping it is interactive enough for them!  I plan on having students solve the problems in their own way for problem 3 and then have at least 1 student show the class how they solved it!

So there ya have it!! I hope that my kiddos feel as excited about it as I do!!! Wish me luck!